Image may be NSFW.
Clik here to view. 13 Step by Step Transparent Clothes Effect Tutorial in Photoshop

Ever wondered how to make your t-shirt transparent that it looks like your wearing a scenery? In this article, I’m gonna show you very easy 13 Step by Step Transparent Clothes Effect Tutorial in Photoshop. So let’s get started.
If you want to use the images that I’m using, feel free to download it below.
Model: https://drive.google.com/file/d/1PfmRgqBOg_T8Ck7EIXywr4RRup_0nO5_/view?usp=sharing
Background Image: https://drive.google.com/file/d/1TbljQw_7wOLlg3zY1J7lpxdIJ3xF1pSL/view?usp=sharing
1. Resize the Background Image
Image may be NSFW.
Clik here to view. Open the ‘Background Image’ that you’re going to use and select the ‘Crop Tool’ then turn it to
16×9 cinematic ratio as shown in the picture.
2. Place the Model in the Background
Image may be NSFW.
Clik here to view.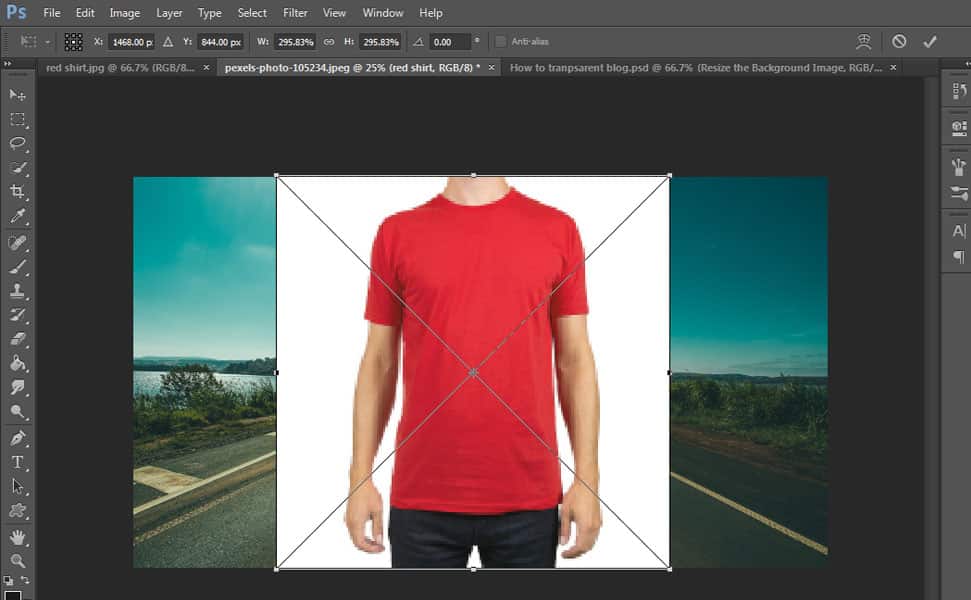
Drag the model image to the background file and resize it by pressing CTRL + T and fit it in the
background.
3. Remove the White Background of the Shirt
Image may be NSFW.
Clik here to view.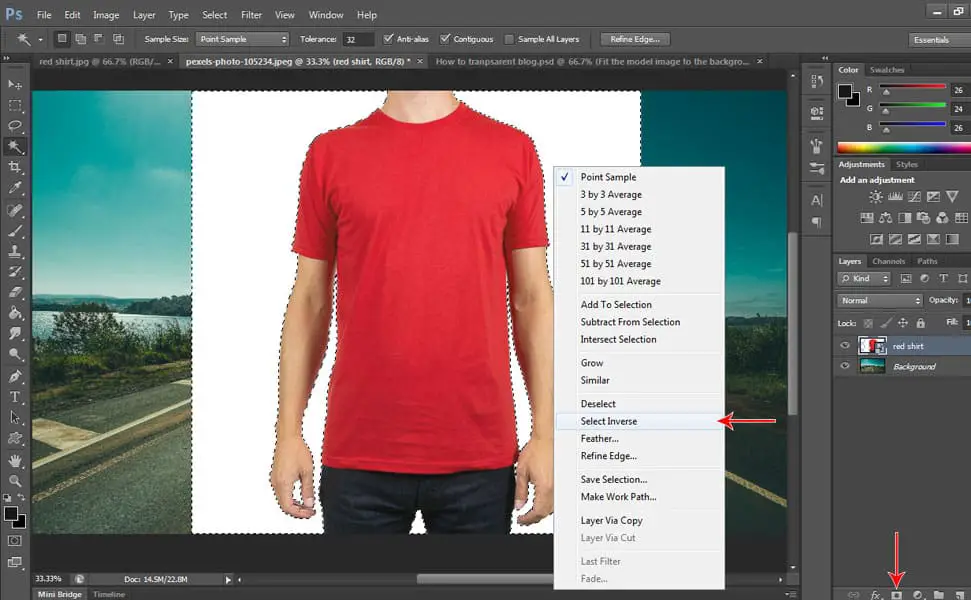
Select ‘Magic Wand’ then select all the whites in the background, make sure you selected all the whites by pressing ‘SHIFT’ while you click on the whites. After selecting all the whites, right click and choose ‘Select Inverse’. Then click the ‘Add Layer Mask’ icon located below the layer tab.
See related article: 16 Step by Step Smoke Effect Tutorial in Photoshop
4. Trace the Shirt
Image may be NSFW.
Clik here to view.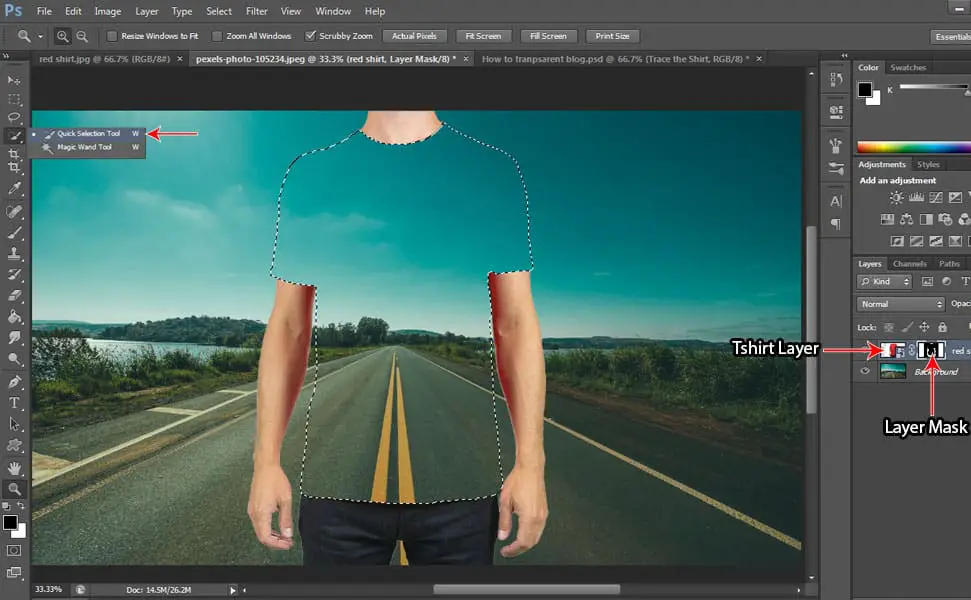
Select the ‘Quick Selection Tool’and select the shirt only. After selecting the shirt, make sure your foreground color is black then click the ‘Add Layer Mask’ icon then press ‘ALT + Backspace’ to delete the shirt. Then select the model layer and press CTRL + J to duplicate the layer.
5. Erase the lines of the Shirt’s Edges
Image may be NSFW.
Clik here to view. The first thing to do is turn off the visibility of the duplicate layer cuz we don’t want anything to do with it for now, so by clicking the eye in the box located beside the duplicate layer, you hide its visibility. Then select the ‘Layer Mask’ of the model layer then select ‘Brush Tool’ and make sure your foreground color is Black then erase the lines of the shirt’s edges by using your brush tool.
6. Turn the Duplicate Layer to Black and White
Image may be NSFW.
Clik here to view.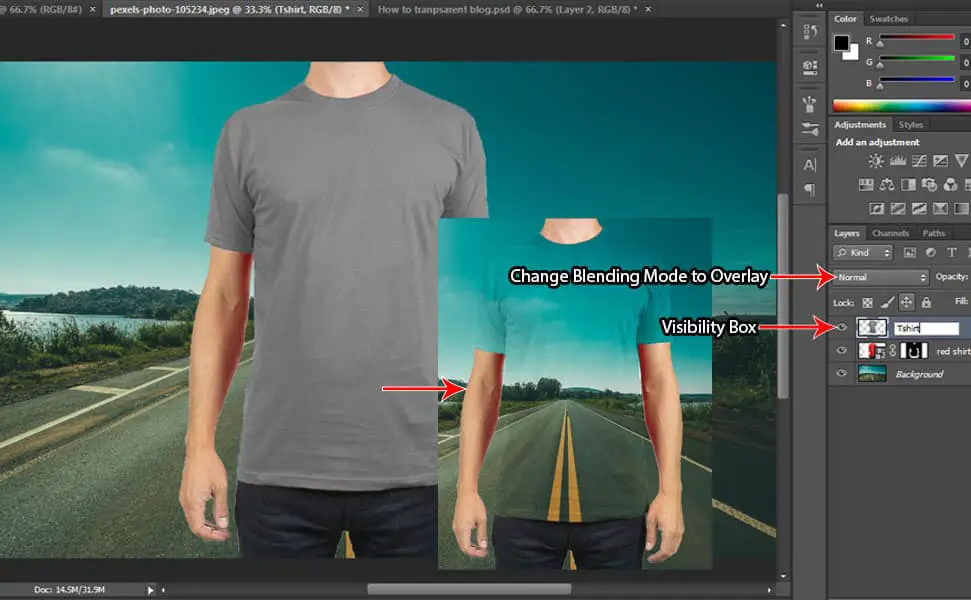
Select the duplicate layer and turn on the visibility of the duplicate layer by clicking the box located at the left side of the duplicate layer then press CTRL + SHIFT + U to desaturate or to make it black and white. Then rename the duplicate layer to ‘tshirt’ so it won’t get confusing later. Then click the ‘Blending Mode’ option located at the upper left of the layer tab and change it from ‘Normal’ to ‘Overlay’.
7. Apply an Adjustment Layer
Image may be NSFW.
Clik here to view.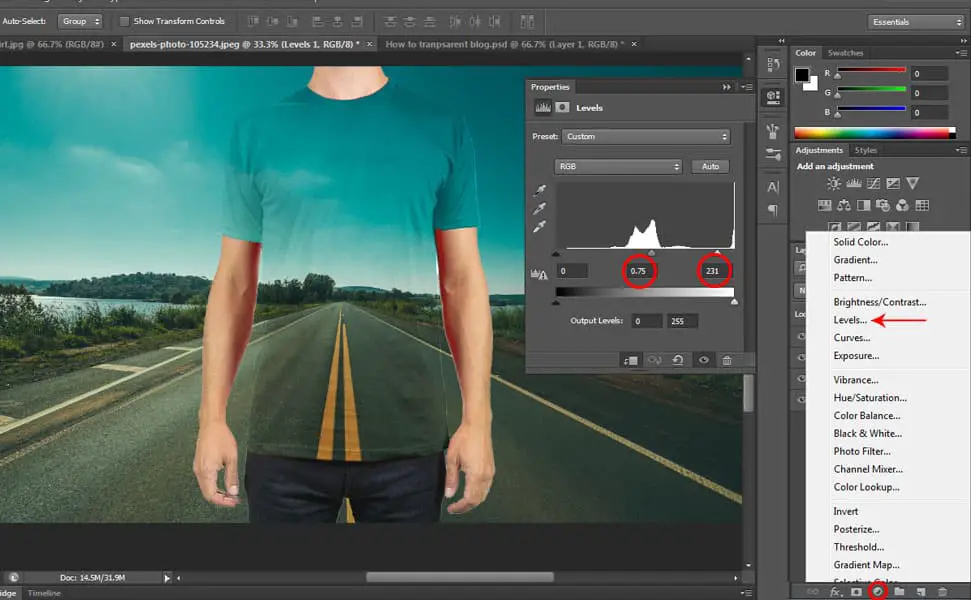
Click the ‘Add Adjustment Layer’ icon located below the layer tab and select ‘Levels’ then on the ‘Levels’ box, type in the mid ‘0.75’ and on the right side type in 231, to add more contrast for the ‘tshirt’ layer. After that, right click on the ‘Levels’ layer then select ‘Create Clipping Mask’.
8. Clean the Edges of the Shirt
Image may be NSFW.
Clik here to view. You notice the white edges of the shirt? To remove it, simply select the ‘tshirt’ layer by pressing CTRL + click on the thumbnail of the ‘tshirt’ layer then click ‘Select’ located at the top bar then select ‘Modify’ then ‘Contract’ and set it to 2 pixels then press ok. Then press SHIFT + CTRL + I to inverse the selection then simply press ‘Delete’ key then deselect the selection by pressing CTRL + D. After that,
you can see that you don’t have that white edges anymore.
9. Save a New Tshirt File for Displacement Map
Image may be NSFW.
Clik here to view.
Click the ‘Square’ icon located at the top right of the layer tab as shown in the picture then select ‘Duplicate Layer’ and you will see a pop-up box where you have to change the Destination option of ‘Document’ to ‘New’ then press ok and you will be redirected to a new ‘tshirt’ document.
10. Blur the New Tshirt
Image may be NSFW.
Clik here to view.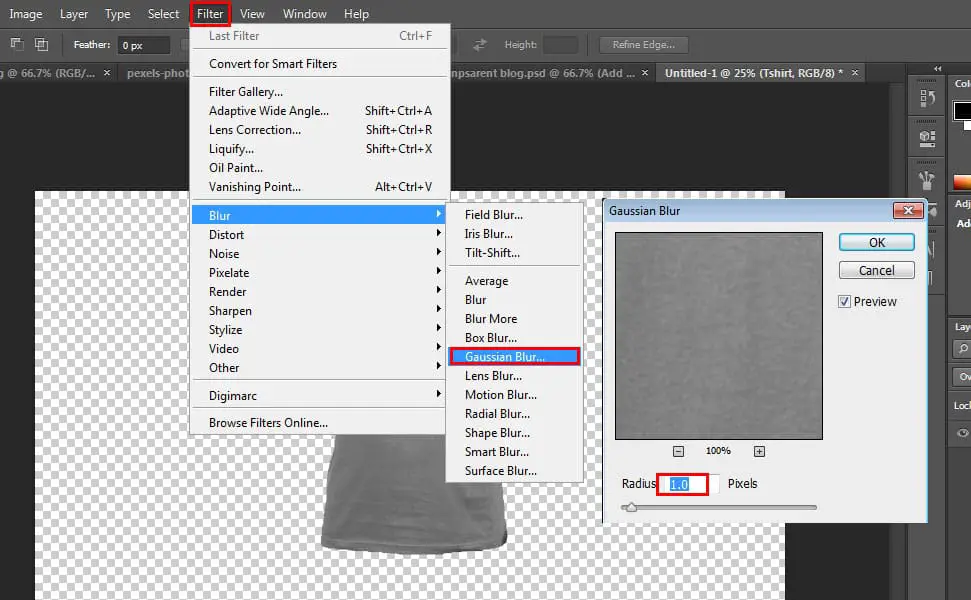
Go to Filter then select ‘Blur’ then ‘Gaussian Blur’ and set the Radius to 1.0 pixels and that should
be enough. Then save it and name it Displacement Map.
See related article: 14 Step by Step Comic Style Cartoon Effects Tutorial in Photoshop
11. Add A Displacement Map Filter
Image may be NSFW.
Clik here to view.
The first thing to do is double-click on the background layer then press ok to unlock it, now it’s renamed to ‘layer 0’ then right click on it and select ‘Convert to Smart Object’. Then go to ‘Filter’ tab then Select ‘Distort’ then choose ‘Displace’ and then you can see a pop-up box so make sure the Horizontal and Vertical Scale is set to 15, and choose ‘Stretch To Fit’ and ‘Repeat Edge Pixels’ then press ok then select the Displacement Map file you saved earlier.
12. Apply the Displacement Map Filter on the Tshirt
Image may be NSFW.
Clik here to view.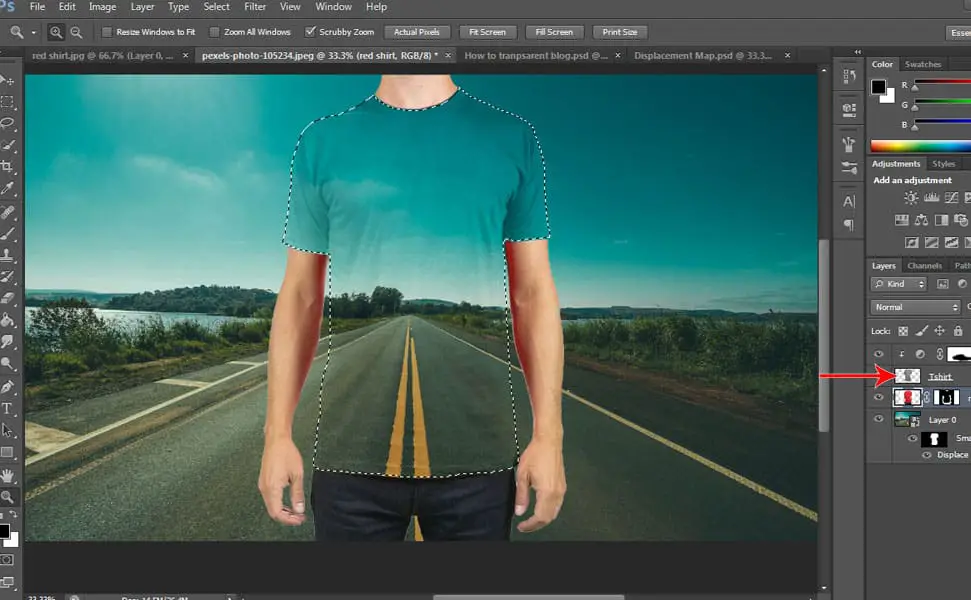
You can see that we applied the displacement filter on the whole image but we only want it for the t-shirt, so to make the effects visible for the t-shirt only, select the ‘Smart Filters’ layer (layer 0) then press CTRL + I to inverse it. Then hold CTRL then click the thumbnail of the ‘tshirt’ layer to make a selection of the shirt then select the ‘Background’ layer (layer 0) then make sure your foreground color is set to ‘White’ then simply press ALT + Backspace then deselect by pressing CTRL + D. Now, you can see the effects applied to the t-shirt only. You can see the difference by turning the visibility on and off by clicking on the box beside the Smart Filter located under the Layer 0.
So that’s it! Hopefully, you followed the instructions correctly and got the awesome result on your end. And if you have any questions, feel free to comment below.
The post 13 Step by Step Transparent Clothes Effect Tutorial in Photoshop appeared first on Design Press.